Showing posts with label Kelsey. Show all posts

04 June 2008

Kelsey Bronze

Well, the first variation of my new prop cards are done. I didn't use the alleged "Kelsey Bronze" I mentioned earlier. Notice how I say alleged. In fact, there may be no such ink at all. Upon further inspection (as in further inspection as I dumped the powder out onto my ink knife and all over my table), what I have is actually Kelsey Bronze Embossing Compound. Yeah, I know. Some of you out there are saying, "Duh" right now. OK. If your such a smarty-pants, then enlighten me on what to do with this stuff. I'd love to use it! And I promise to actually READ labels completely in the future.


Anyway, check out my first prop cards. I ended up using a really simple green and I am very happy with the results: simple design and quirky centering. I only use one gripper, so each card has a somewhat unique and not-so-level placement. I like the variation and imperfection. Hope my new APA comrades do too.

29 May 2008

Prop Cards

I am fascinated by letterpress printing Prop cards. They are the traditional calling card of a private press proprietor, and a traditional I am happy to follow in my (almost) finished APA membership. Below are some wonderful examples of others' prop cards, courtesy of Briar Press.


I have been printing my proprietor cards this week. I've completed the first color printing and have one more to go. I did the text in a nice Kelsey Peacock Blue on beautiful French Paper ice blue card stock. My APA logo will be added in Kelsey Bronze. I've decided to do three variation, using different configurations of the text, etc. Send me your mailing address if you'd like one!

I know that due to my limited type faces and spacing materials at this time, my card will not be stellar. It will be a great project, learning experience, and way to become a part of the vibrant letterpress community. I am looking forward to proudly displaying my new APA member ship. #830!

11 January 2008

Roll Roll Roller Wheels!


My new "trunnions", as they are called in my original Kelsey Printer's Guide Book, finally came in today from NA Graphics out in Colorado. I've been waiting patiently and today was the day! My experiments with the old trucks (see previous posts) didn't go well, so I'm glad the new parts are now here and ready to be used. I put the nice shiny new ones on this afternoon and gave it a quick lubrication. Everything is sliding nicely and I did a quick test impression without ink. The impression screws look like they need some adjusting.

Now, I just need more type case storage!

15 December 2007

14 December 2007

Kelsey Type Faces

01 December 2007

Before and After


(before)


(after)

sorry for the photo quality...It is actually alot cleaner now, although it is hard to tell.

And now, for a PSA:

Letterpress and Safety

I learned a valuable lesson this past week: wear gloves, either rubber of otherwise, for two reasons. The first is to avoid dingy fingers (which I now have). I had to go buy special orange pumice soap that mechanics use to get my hands clean. The second and more important reason is to avoid Tetanus. Here is my cautionary tale. I didn't wear any gloves and while cleaning and scrubbing I did manage to nick myself a few times and cut myself mediumly-bad once. Today, upon telling my dad that I had finally cleaned my (rusty) press and subsequently cut myself, he asked if I had a Tetanus shot. "Hmmm", I thought, "When was my last Tetanus shot?" Well, folks, after 20 minutes on hold with my doctor's office and a short conversation with a nice nurse, the answer is at least 17 years ago, so now I have to go get a Tetanus shot. Let that be a lesson to you. Ok, let that be two lessons to you.
  1. Wear gloves while cleaning your press
  2. Get a Tetanus shot every 7-10 years
Thank you and goodnight.

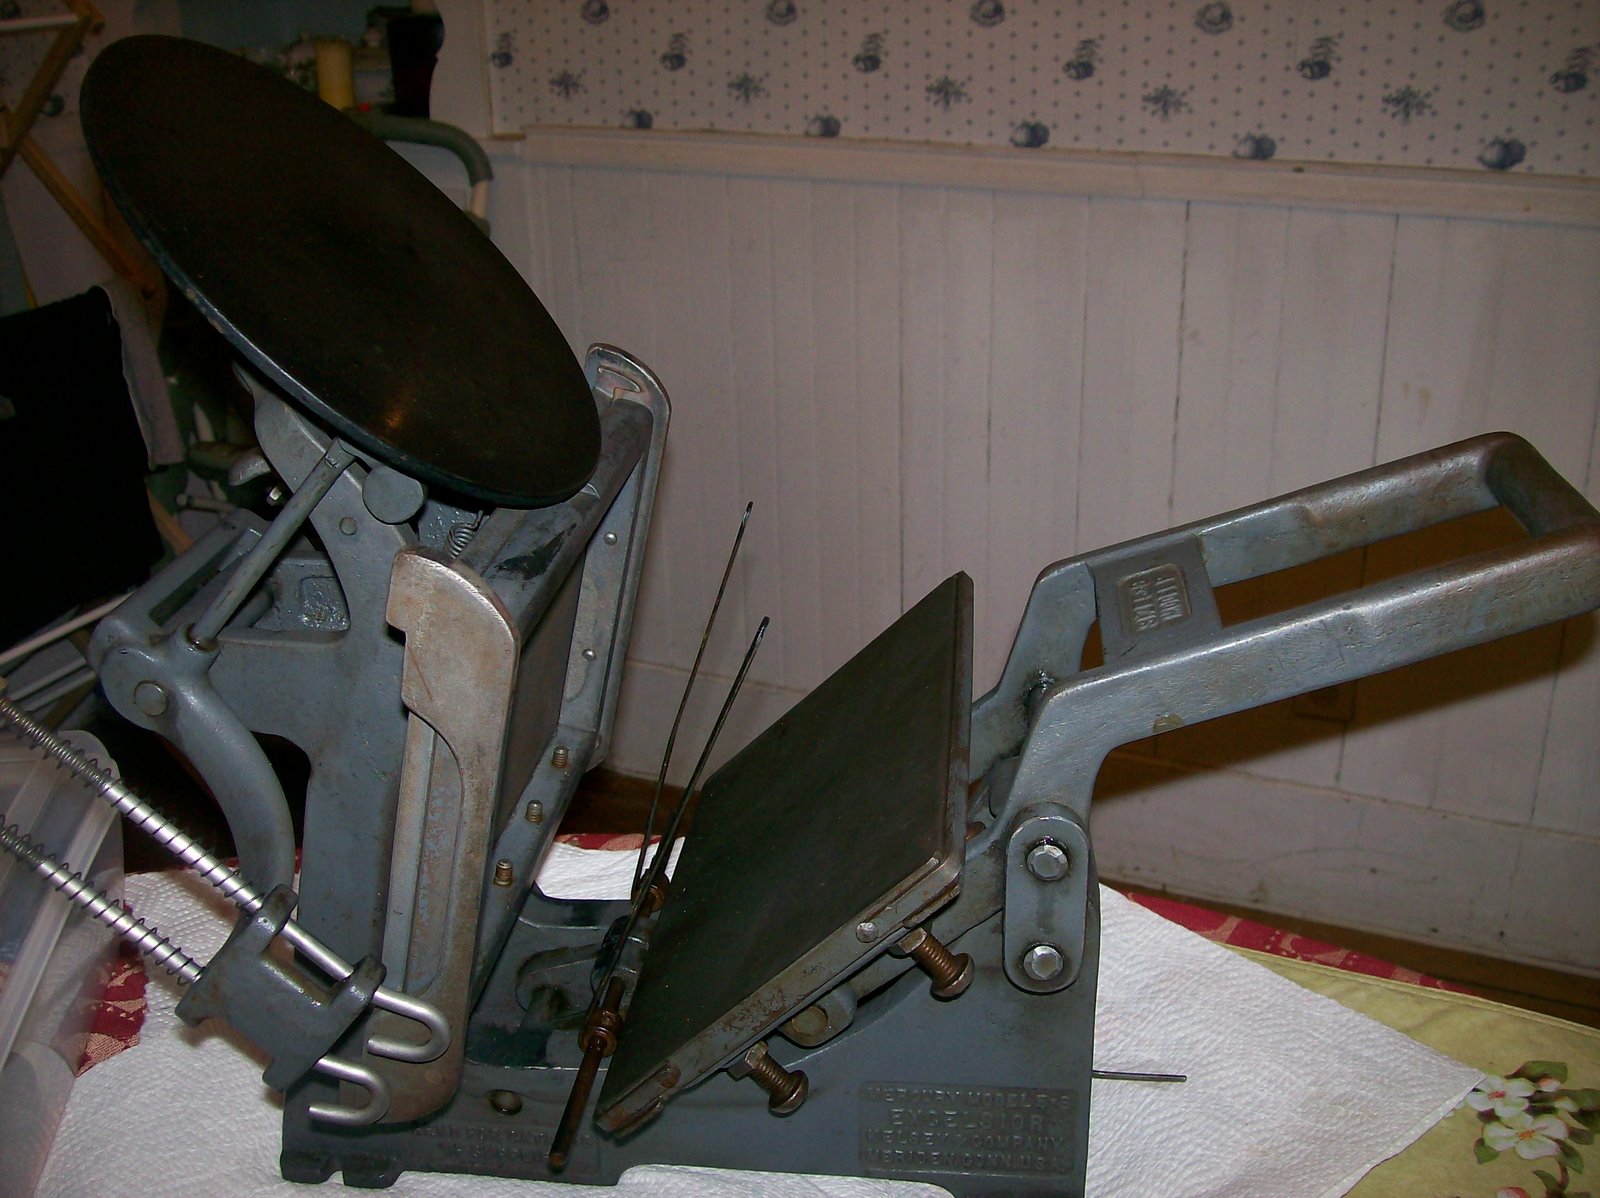
Restoring a Kelsey Model P 5x8

Hi folks. This evening I finally had time and motivation aplenty to tackle a medium-sized project that felt like a large-sized project. I cleaned and restored my Kelsey press, which until now has been sitting patiently in my office, awaiting the love and attention that it deserves. I bought my press from a really nice woman in Rochester, NY, but she had never used it herself and it sat in a garage for an extended period of time. I even drove all the way out there to pick it up myself, not trusting any package carrier to not damage the fragile cast iron machine. Needless to say, it needs some TLC before it can be expected to print anything at all.

So, to begin, here is my supply list for this project:
  • WD-40
  • 3-1 oil
  • Scotch Brite pad
  • paper towels
  • stick brush (large)
  • wash bin
  • white vinegar
  • lemon juice
  • a plastic trash bag
  • lacquer thinner
  • I also highly recommend rubber gloves, which I failed to use and really wish I did...
First, I cut open a trash bag and put that down on my work surface (my dining room table). Then I assembled the rest of my tools and had my lovely husband bring the press down from upstairs and put it in the middle of the table.

I used the WD-40 around the ink plate and chase bed. Then I removed the chase, bed, and ink plate, along with the roller hooks, springs, and nuts. Mixing the vinegar and lemon juice about 2:1 in the wash bin, I gave the chase, bed, and accessories and a quick wipe and put them in to soak. It took about 25 minutes before they were ready for scrubbing.

I continued to apply WD-40 liberally to all moving parts, screws, and bolts. I used the Scotch Brite pad and the stiff brush to scrub any dirty areas and applied more WD-40 as I went. When I felt it was clean enough, I checked my soaking pieces. I used to Scotch Brite pad on the pieces and gently rubbed off the rust. I dried them thoroughly and placed them on paper towel.

I used the lacquer thinner on the ink plate and gave it a nice once over. It is also sitting on paper toweling. The roller hooks, nuts, and springs are still soaking, because I put them in last with the chase. Once they are dried off, I will reassemble (and reapply lubricant) and put the new rollers on.

Things to remember:
  1. Keep your screws, nuts, bolts, pins, etc in order, so you can reassemble properly
  2. Wear gloves, unless you like having gray fingernails
  3. open the window for crying out loud (a.k.a. work in a well ventilated area)
  4. Take pictures, share them, and enjoy the process!
I'll post some "before and after" photos when I reassemble, probably tomorrow night.